ROS Networking

 Today, we describe how to use ROS Fuerte over the network and have a couple of ROS nodes running on different machines. We assume that you had successfully installed ROS and that you tested it on a single PC by running some tutorials. We also assume that you are running ROS on a PC with Ubuntu which is the reference platform for ROS. Ready? Then, let’s go!
Mapping IP Addresses to Hostnames
We work with two laptops named r2d2 and c3po. Both are under Ubuntu 12.04LTS and are connected to the same LAN. We use a wifi network, which is more convenient for controlling mobile robots.
In our network only servers have fixed IP addresses registered in the DNS. Our two PCs r2d2 and c3po are connected via DHCP. This means that their IP addresses are dynamic, they might change each time we connect Wifi. Fortunately, the IP address assigned to each machine in a given network tend to be stable overtime, especially in small networks. It seldom changes, so we can assume it as fixed.
To know the IP addresses of our machines, we look them up in the connection information menu under the wifi icon of the task bar (see Picture 1). Note that if your PC is connected to ethernet, the network icon will be different (double arrow). An alternative option is to execute ifconfig in a terminal.
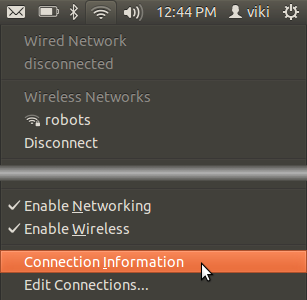 Picture 1: Connection Information Menu
The connection information menu opens a window (see Picture 2). The tab title is the SSID (i.e. the name) of the wifi network. Note that in case your PC is connected to ethernet, you’ll have two tabs, one for ethernet, and the other for wifi.
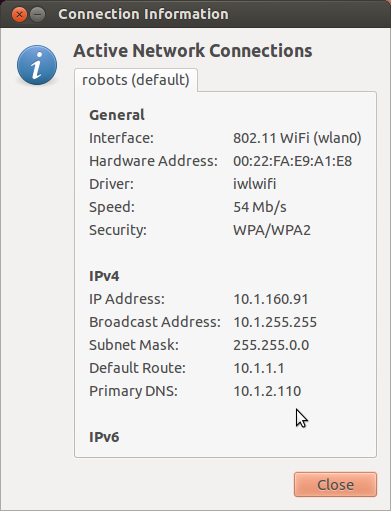 Picture 2: Connection Information Window
10.1.160.181 c3po
Symetrically, we add the IP of r2d2 in the hosts file of c3po.
10.1.160.91 r2d2
Note that you need administrator rights to write access the hosts file and be allowed saving it. So, open the editor by evaluating the following command line.
sudo gedit /etc/hosts
It is important to remember that we are using IPs allocated by the DHCP. Although most the time such an IP is reused by the same machine, it can be assigned to another computer. So, if you have trouble in a future session, think to this issue and check the IP assigned to your PC.
Time to check our connections. First a ping to ensure that both computers are on the same network. Evaluate the following command in a terminal.
viki@r2d2:~$ ping c3po
We put the prompt (viki@r2d2:~$) on the command line to show that we are running the command on r2d2. As a result, we get a series of lines saying that we received some bytes from the c3po and that the transmission took some amount of milliseconds as shown by Picture 3. The ping continues running endlessly until we press Ctl-c.
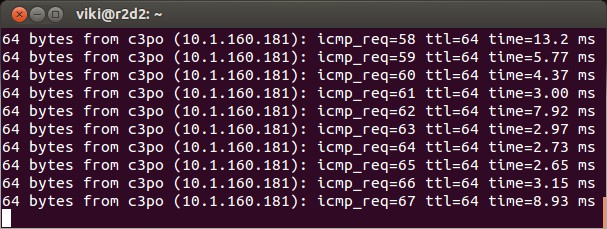 Picture 3: Ping to check that the two PCs are on the same network
Installing SSH (Optional)
Having SSH is not mandatory, but it makes life easier since it allows to work remotely. This is useful when the PCs are not next to each other. By default, Ubuntu comes without SSH. So, we have to install it ourselves by for example evaluating the following command in a terminal:
sudo apt-get install openssh-server
We do this install on both laptops. We use an account with administrator rights. After providing the password, SSH is downloaded and installed.
Now, let see if we can access one machine from the other through SSH. We assume that there exist an account for a user named viki on c3po. On r2d2, we evaluate the following command line where the user name viki is followed by an @ and the name of the remote machine which is c3po.
viki@r2d2:~$ ssh viki@c3po
After providing the password for viki, we land on c3po. The prompt is now viki@c3po:~$ . So, we can work remotely on c3po. For now, we just quit by pressing Ctl-d or by typing exit.
ROS Environment Variables
ROS needs to know the name of each machine it is running on. This done by setting the ROS_HOSTNAME environment variable of each machine with its own name. Besides, we should provide ROS with URI of the master node, that is launched by the roscore command. Since in a ROS graph, there should be only a single master node, its URI should replicated on all machines by setting the ROS_MASTER_URI environment variable.
In our setting, we chose to run ROS master node on c3po. So, in r2d2 we modify the .bashrc file to set the environment variables as following:
export ROS_HOSTNAME=r2d2
export ROS_MASTER_URI=http://c3po:11311
On c3po, we modify the .bashrc file to set the environment variables as following:
export ROS_HOSTNAME=c3po
export ROS_MASTER_URI=http://c3po:11311
It’s almost the same, except for the hostname. This is why we put it in bold, just to highlight the difference.
Time for Test
First and foremost, we have to start the master node. So, on c3po, we execute roscore as following:
viki@c3po:~$ roscore
For this test we’ll play a bit with the turtle simulation provided with ROS. We run the turtle engine and display on one machine, say r2d2. The control is performed remotely on c3po to demonstrate the interaction between remote nodes.
We run the simulation on r2d2 as following:
viki@r2d2:~$ rosrun turtlesim turtlesim_node
As a result we get a blue window with a turtle standing still in the middle such as the one of Picture 4. The colors and the drawings of the turtle may be different on your machine. They actually change on every launch.
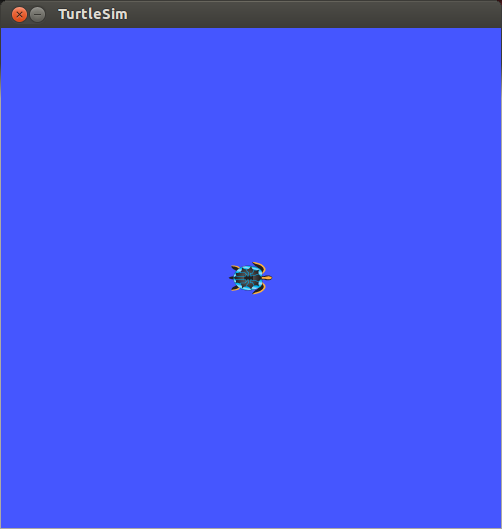 Picture 4: TurtleSim Window on Startup
Now we run the turtle controller on c3po. We chose one that makes the turtle indefinitely draw a square. It is run by evaluating in a terminal the following command line:
viki@c3po:~$ rosrun turtlesim draw_square
The log of the interaction with the simulated turtle is displayed in the terminal as shown on Picture 5.
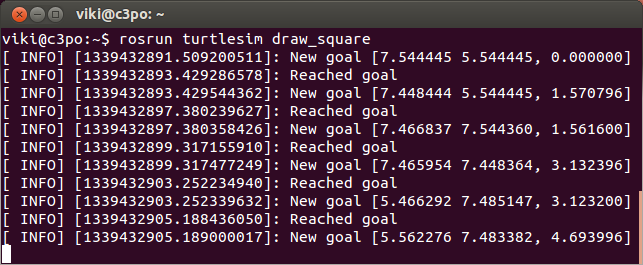 Picture 5: Turtle controller and log of the interaction
On the simulation window, we see the turtle moving. The path it follows is drawn as white lines. After few iterations, the display looks like the one provided by Picture 6.
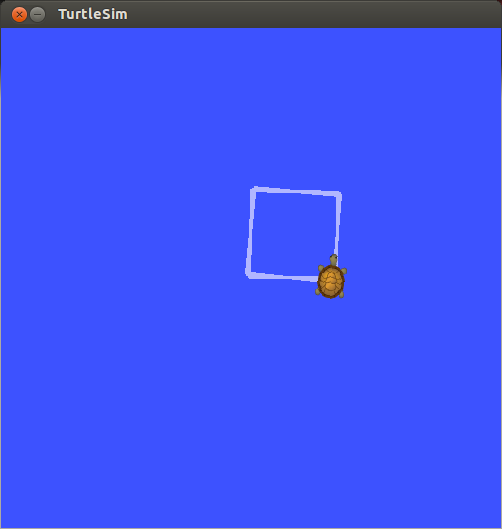 Picture 6: TurtleSim window after running the controller
It works. Congratulations! As a final remark we would like to point that the order of execution of nodes is arbitrary. We could start the controller first, and then the simulator. The result would have been the same.

19 Comments
Hello,
Nice tutorial. I have a problem with the network setup. I am using your tutorial to understand how to install the turtlebot on robot pc and workstation. Question is I want to map the corridors where there is no wifi network available. In such case how to remotely control and connect the two pcs? Can you suggest something. I have seen people mapping large environments using turtlebot , how do they continue to have wifi network in such large area? Please advice.
Thanks
Actually, the turtlebot can work without any network as long as ROS nodes and roscore are running on the turtlebot laptop. All you need to do is to set ROS environment variables point to the local machine by setting the .bashrc file as following:
export ROS_HOSTNAME=localhost

export ROS_MASTER_URI=http://localhost:11311
Thanks , got it working..
I have another problem.. I can ssh into the robot pc but now I cant get the sashboard to come up.. It is on the robot pc.. how do I see the dashboard (turtlebot tutorial)on my workstation…
Same problem with the rviz..
I learned that I need to ssh -X into the robot pc .. that way I was able to see the dashboard.. but for rviz its way too slow..
How to fix this , any suggestions??
ROS is a middleware meaning that it supports networking. So, you can have nodes running on different machines a we showed in our tutorial on ROS Networking. Since rviz is a ROS node, it can be run on your own PC, while roscore and other nodes are running on the robot’s PC.
Thank you for your tutorial. :)
Hey Nootrix, I have installed the virtual box + ROS package in my machine. In the turtlebot laptop, I have the Ubuntu 12.04LTS. I’m trying to ping between the machines. The problem is: the turtlebot laptop is using the wi-fi and my computer is using the wi-fi too. But, in the Virtual Box, the Ubuntu is not using the wi-fi. It is using the ethernet. So, when I ping between the machines, it doesn’t work. Do you know how can I fix this? Change the Ubuntu in Virtual Box to use the wi-fi instead of the ethernet?
Hi Yrik, it’s not a problem that the ubuntu in virtual box uses the ethernet. What matters is how the virtual machine is connected to the network. If you look at the setting, you’ll see in the network section that which network adapter #1 is enabled. If you want the virtual machine connect to the network through your wifi, select the wifi (Airport on Mac OS) under the name drop-down list as in the picture below. Also, ensure that you are using the “Bridge Adapter”.

Hi NooTriX, first of all thank you for your tutorial, it helped to solve a remote communication problem (without adding the computers’ names in the /etc/hosts file ROS didn’t manage to establish a communication among the distributed nodes). Now I am trying to do the same thing using UDP protocol (I specified in my node I want to subscribe a topic in an unreliable way), but I have again some communication problems: if the nodes are on the same machine and the core on a remote one everything works fine, if I move one node to the same machine with the core no packet arrives. Is there any system configuration I need to set up to make it work?
Thank you in advance
What if both of my computers have the same name, and what if I am working with a 3rd computer with the same name?
I didn’t choose the names the pc’s came already preset with a default name and is locked.
Use instead ROS_IP environment variable where you provide the IP of your machine. Different computers on the same network always have different IP numbers. BTW, don’t forget to remove the ROS_HOSTNAME variable if you use ROS_IP. Otherwise ROS_HOSTNAME will take precedence over ROS_IP.
Great tutorial–I wish there were more. Could you advise which of the many ROS tutorials might be completed next?
Thank You for a nice tutorial.
When I enter SSH [ip address]
and enter the password I login on my another computer, it keep returning incorrect
after I disable password authentication,and do it again.
It said Permission denied (publickey).
I hv 2 questions
1. what is the password and how could I reset it?
2. how to fix the publickey problem?
Thank you
No sure to understand the question.
Anyway, the password is viki.
Dear Nootrix,
Thanks for this tutorial. I set up network without any problem but when I run the example of “turtlesim draw_square ” it dose not work. I mean the turtle dose not move and also there is no error. I’ve already checked the network with “netcat” command and it worked fine. I would appreciate it if you help me out
hi nootrix
i have downloaded ova file from here: http://nootrix.com/downloads/#RosVM
i have two computers with Virtualbox installation.
onw with windows 8 and other with 7.
ran on both….
first of all i have had same ip and same HOSTNAME = c3po of both computer. so i changed one’s to r2d2.
all installed ssh….
but when I ping between the two, it say it cannot resolve unknown host….
any suggestions…
Hi nootrix, I am facing problem in ROS networking. On one PC there is ubuntu 16.04 and on other there is ubuntu 14.04. ping works on both computers. Also, I can see the topics published by the master on the client but when I use rostopic echo any topic on client it doesn’t work. However, using rostopic echo on master works. Both the ROS computers are connected through a common LAN cable. The master IP is 192.168.154.55 and the client IP is 192.168.154.54. On master i used export ROS_MASTER_URI=http://localhost:11311 and export ROS_HOSTNAME=192.168.154.55. On client side I used export ROS_MASTER_URI=http://192.168.154.55:11311 and export ROS_HOSTNAME=192.168.154.54